
Easy Peasy Compositions 3
Shortcuts to finishing a cohesive design

It’s been a while since we talked about working with ready made mixed media style papers. If you’re a digital or hybrid scrapbooker who wants to speed up their design process or learn new skills these tips may be helpful to you.
Our ‘ready made’ Mixed Media Scrapbooking papers are powerful tools and sometimes just the paper itself can be a great creative catalyst.
Here are some tips:
Look for papers that support a suggested composition. Seek out papers from your stash where . . .
Design elements may intersect
Where there are leading lines
Are there areas of interest that could be used to support focal points?
Do you see any interesting marks that you could connect together?
Look at the shadows or the lighting of the paper. Are there areas that are highlighted, brighter, or calmer where you could focus on building your design out? OR that would allow for great ‘breathing space’ around your design?
Papers that have ready made art marks or areas that are stamped or embellished in some way will help in your overall and finished design
Are there marks or painted areas that could provide a backdrop or mount for a photo?
Many of our ready made Mixed Media Background Papers have already done the hard work for you. They help you in determining where to place your photos or embellishments.
When creating, use the suggestions from the list above to select a paper and then examine the areas of the paper where you could start building out your composition.
Refer back to the tips above and consider where the design elements may intersect or where there are leading lines. Examine the marks in the papers and the areas of interest and decide which paper suits your current mood, your other supplies, or the photos you are working with.
Select an area of the paper that you think is a good a starting point - this is where the tips above are handy as once you make a start you can move forward in a reactive way depending on how your design is building out.
CREATIVE EXAMPLES
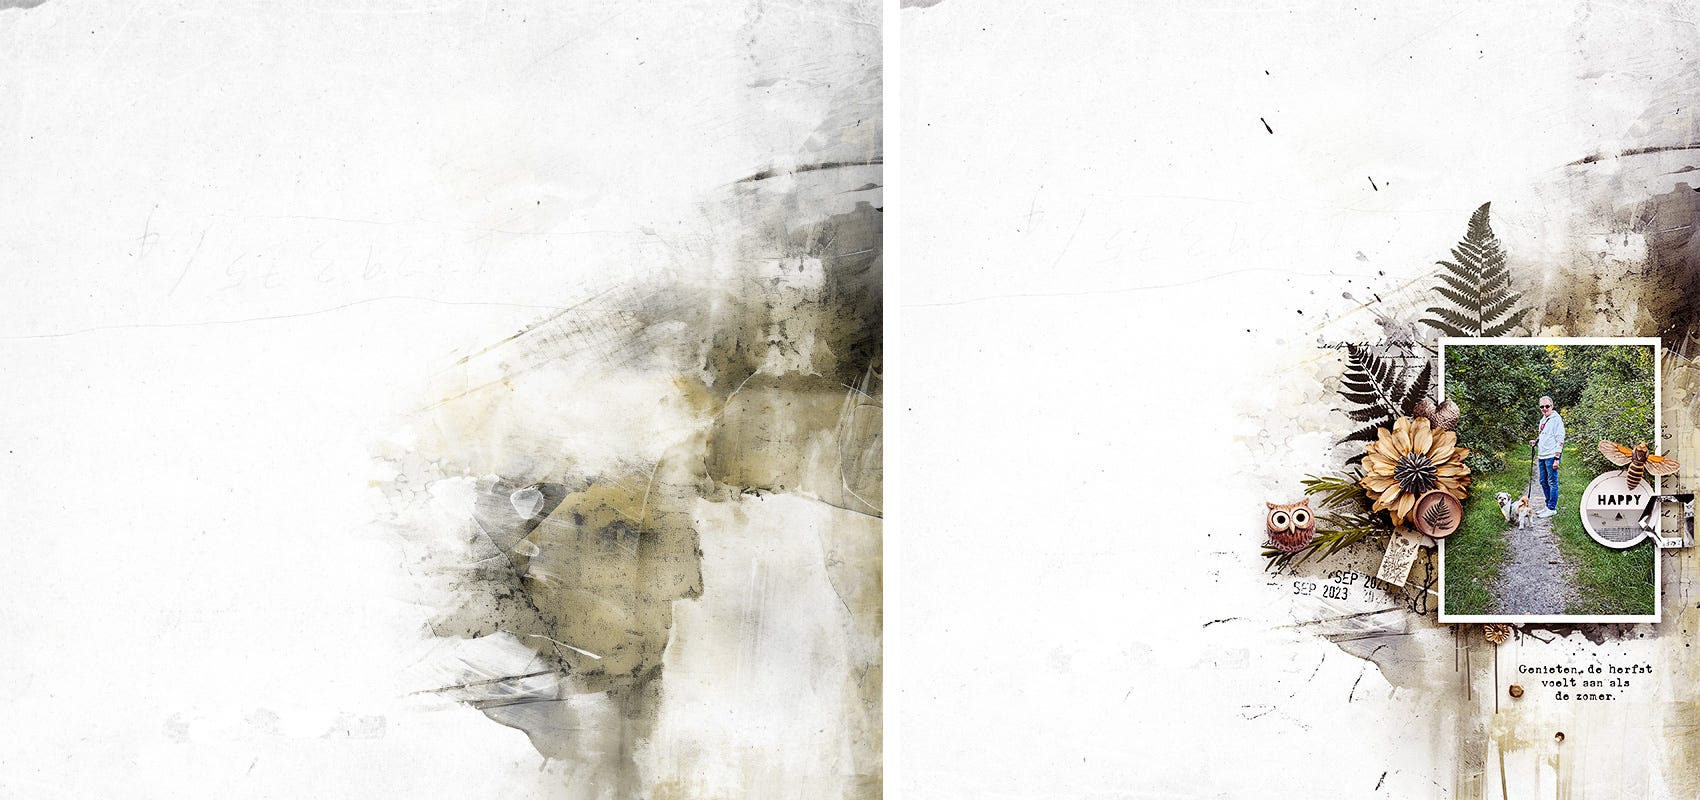
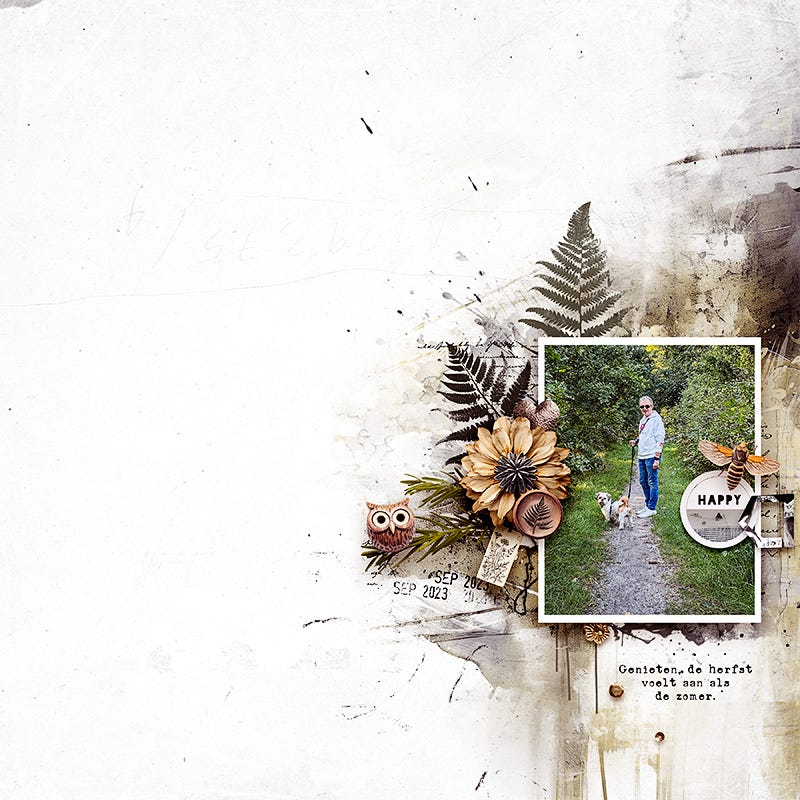
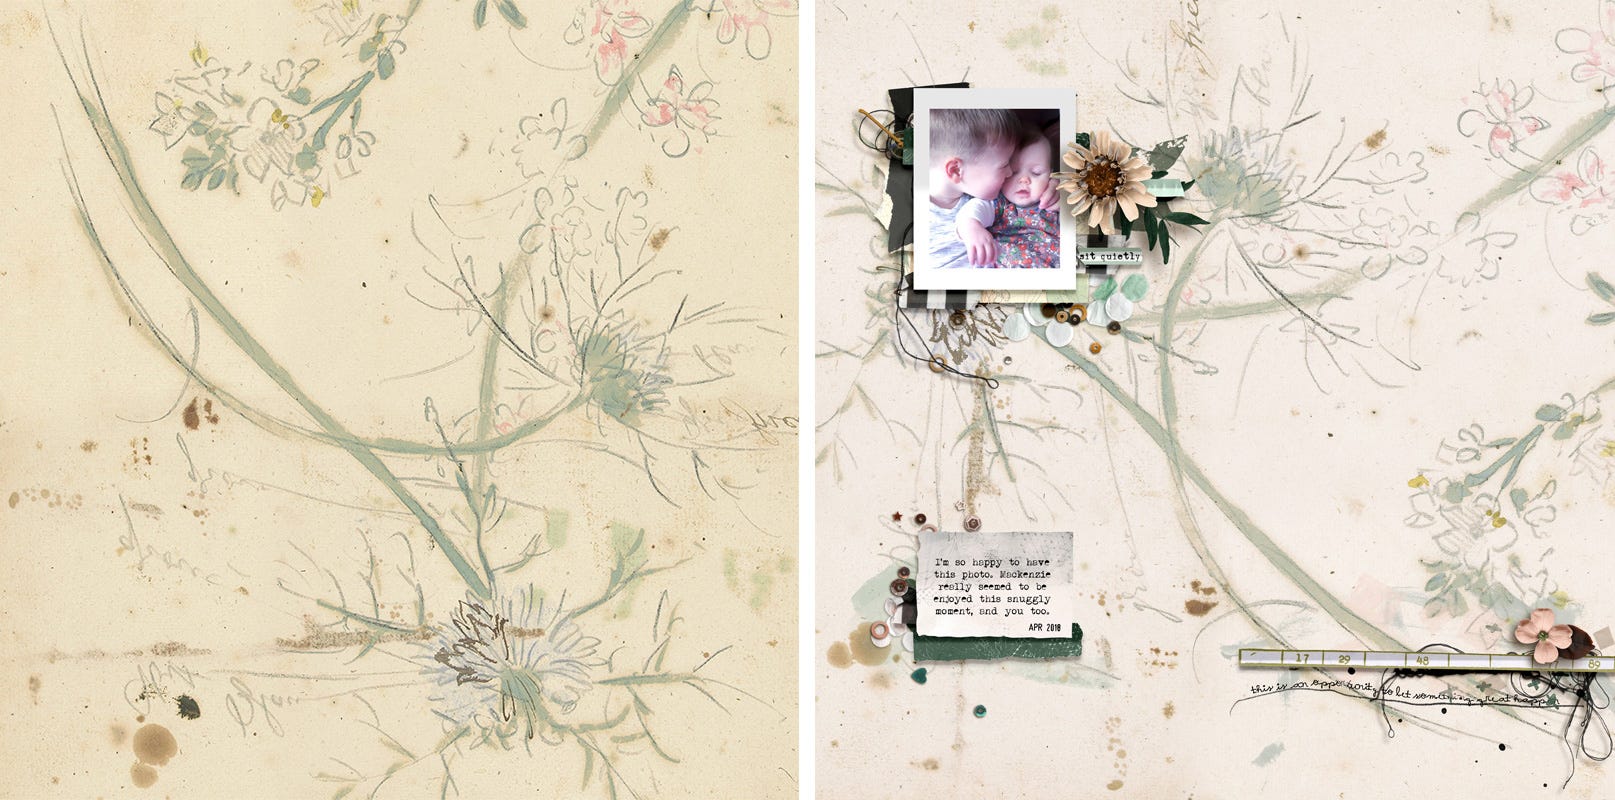
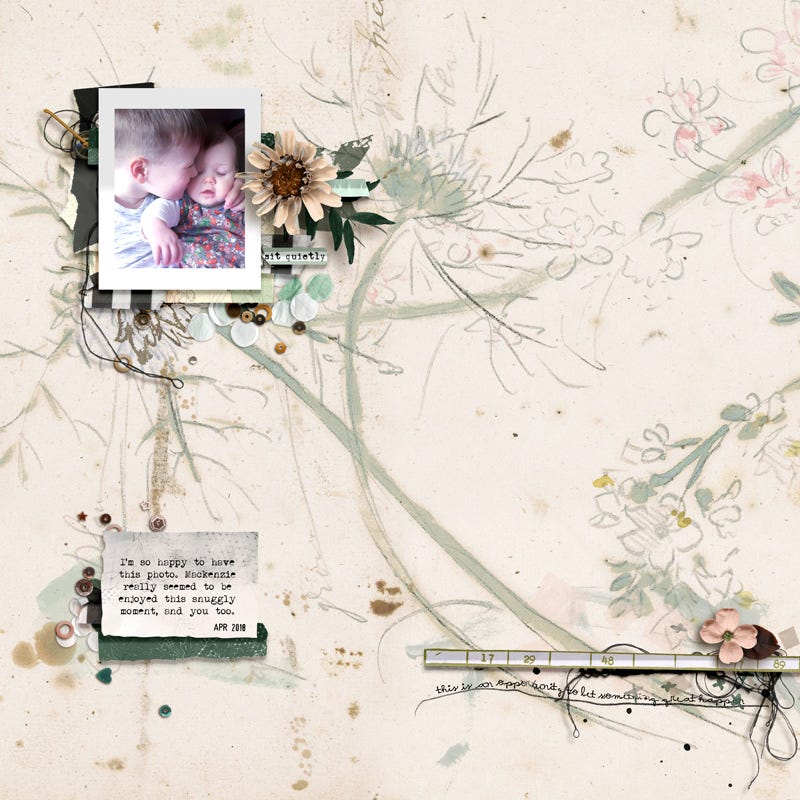
I came across a layout by Lynn which is a great example. She used one of my collage papers from our New Connections Collaboration and placed her photo onto a leading line where the collage paper intersects with the watercolour botanical.
Here’s the empty paper so you can see what I mean . . .
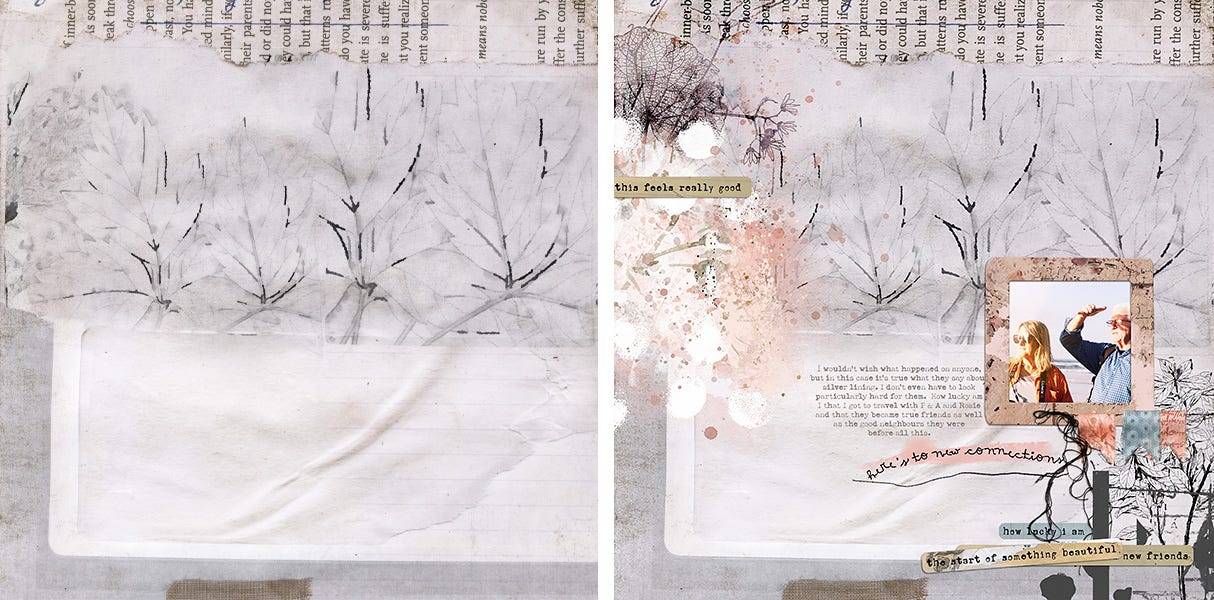
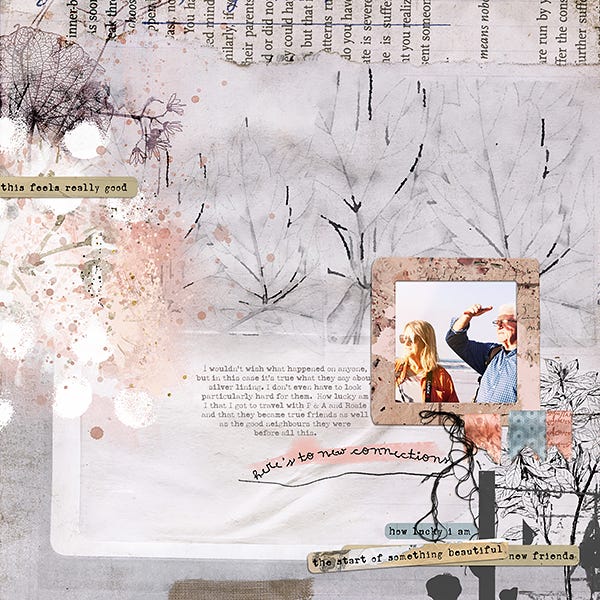
Notice how Lynn has continued to build her composition down and then out, yet the overall flow is diagonal leading the eye up and out towards the corner - this is very cleverly done considering the subject in the photo is looking into the distance and she’s also placed their eye line along that leading or intersecting line where the two textures of the paper meet. I can’t help but thinking she intended for that lovely warm mixed media digital paint she’s added along the edge to be the light and warmth from the sun.
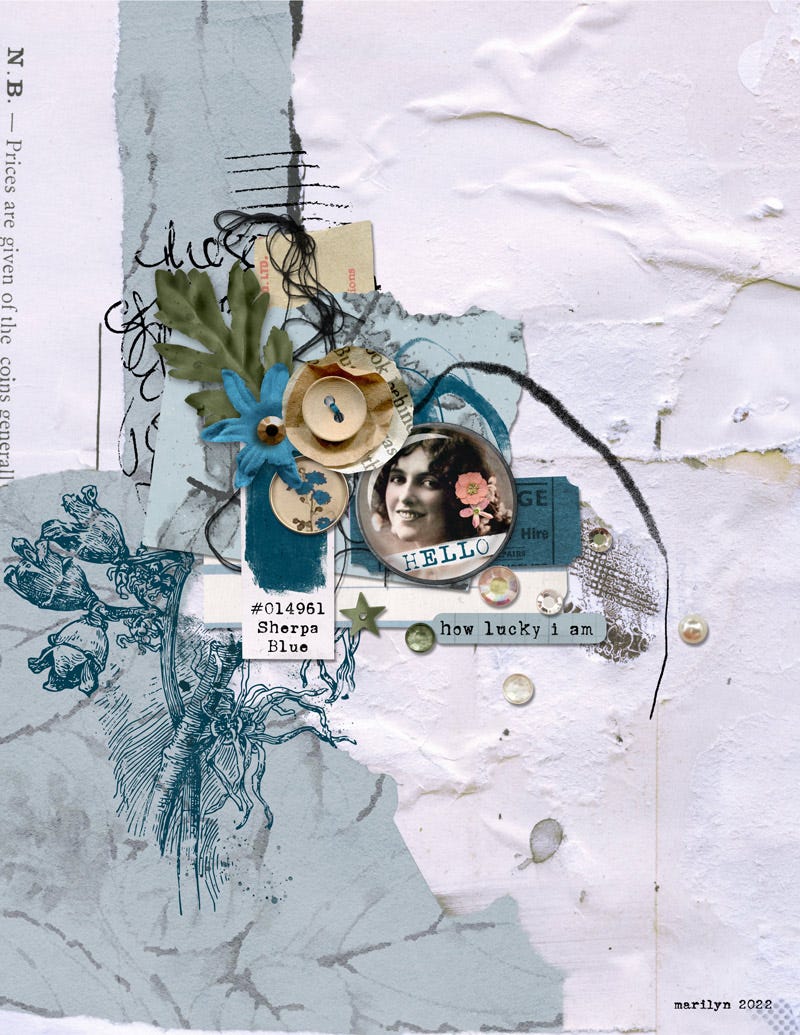
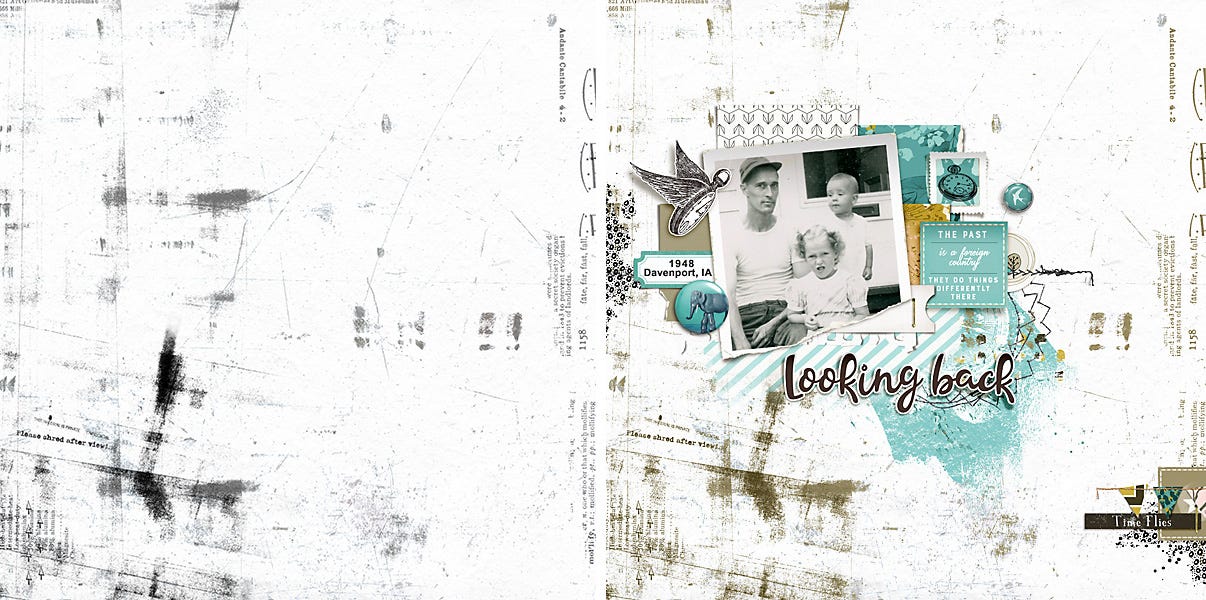
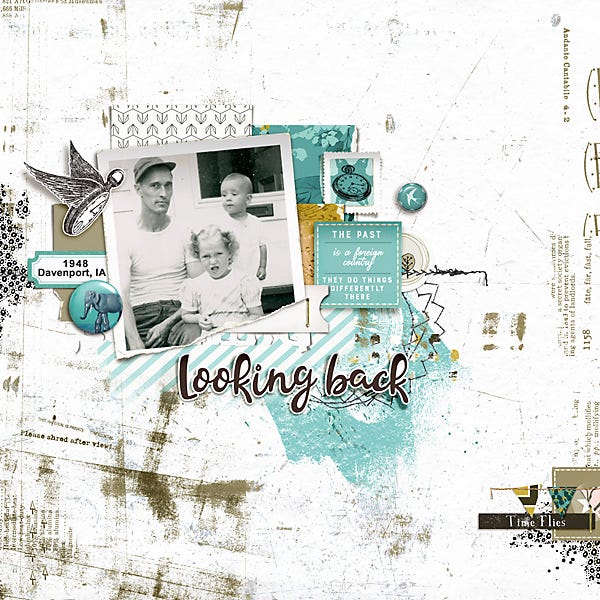
Marilyn worked with a different collaged background paper but used the same technique. Positioning her focal point and clusters on a leading line/intersecting point where different papers meet.
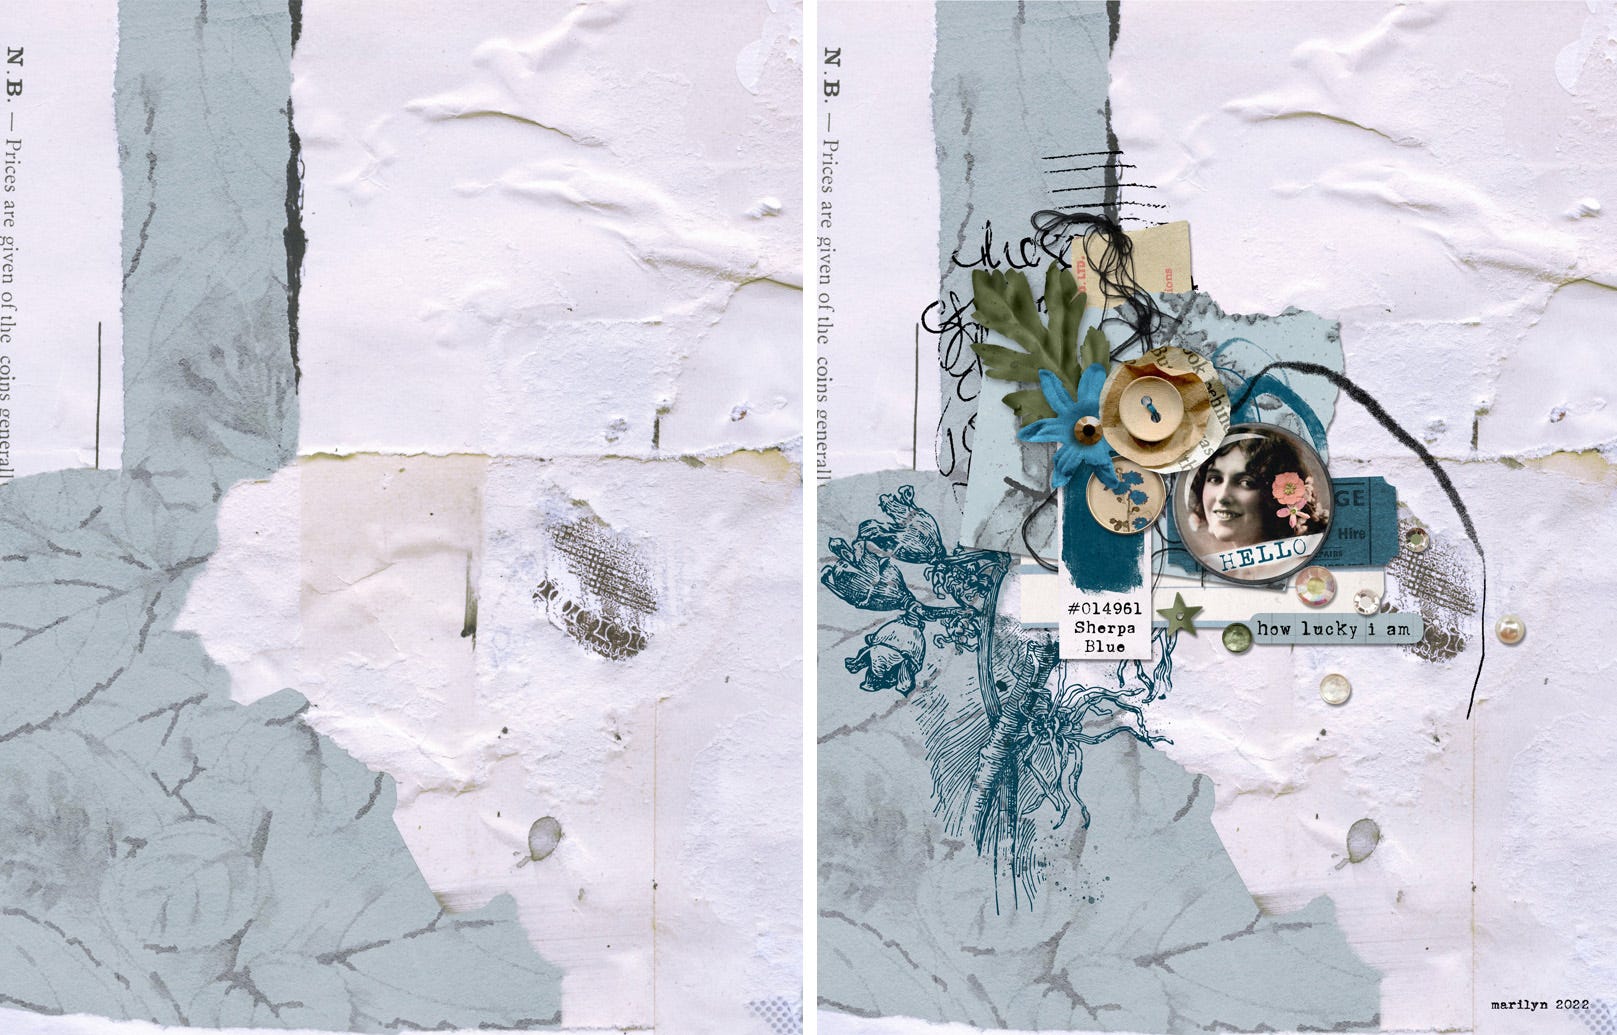
Notice how she has positioned her photo and elements carefully, nestling them into the blue area to allow the white areas of the paper to add that lovely ‘breathing space.
Similar principles apply when working with a painted abstract paper such as this one from the Hampton Collection. Aly used the painted area along the edge for the backdrop for her photo and elements and allowed the white negative space to serve as breathing room.
The painted paper adds so much to this layout, almost acting as a continuation of the soil and grass.
Carol used the Destruction Services abstract paper in a clever way by positioning everything ‘just so’ enabling the marks and stamps and paint from the paper to embellish the edges and bottom of her page.
What about if the paper is a little busier or has actual pattern?!
Try and use art marks or pattern to your advantage. In this case, a paper from the Sanguine Collection had long trailing stems - the original paper orientation had them facing the other way so I flipped it and positioned my photo above so that they became one with the overall design and helped to connect the different areas of the layout together.
Connect!
We always love to hear from you. Do you follow a similar approach when working with mixed media papers or are these tips new to you?
We’d love to hear if they are helpful in some way, it helps us to know we are creating the type of content that’s useful and inspiring to you.
And, as always, thank you for reading and thank you for being here :-)
Rachel & Lynn